Showing posts with label scrapbook. Show all posts

Monday, September 2, 2013

Rawr! Scrapbook Page Kit Release

Good morning everyone! I am loving this holiday weekend. My bebe dragon didn't have daycare Friday, so I have had four days off. Four. Days. Wooo! :D Better still, my dear friend Rachel from Sheepish Shenanigans is coming down to play. Since she's a rat fink and moved 3 hours away, it's been a while since we've been able to do this.

The sun even agreed with me yesterday and let me take photos of some new goodies for the shop. Today I'm sharing my latest scrapbook page kit with you - Rawr!

Rawr! That's dragon for "I love you"
I admit, I may have had my little dude in mind for this one. After all, he'll tell you what dragons say - RAWR!

The kit comes with everything you need to make the pages, though the dragon is a little tricky. If you'll bear with my craft room lighting camera phone photos, I'll walk you through it!

Dragon Pieces
All right, here are the pieces, arranged into their groups; head, body, wings, base. I used my Zig glue pen and the Mono Glue to put everything together. The nice thing about liquid glue is that it gives you a bit of time to shift the pieces if needed. Let's start off easy with the wings.

Assembled wings
Admittedly, these are some of the easier ones. See that dark spotting on the right one, though? That's what happens when you first attach them upside down...don't do that. It's messy.

Assembled torso
The body isn't too bad, either. The deep green is your base, followed by the yellow for the tummy then topped with the light green.

Assembled tail
The tail is next; again, dark green on the bottom, light green on top.

Assembled ears
The ears are pretty simple as well; one is all set, the other needs to be attached to the white piece to give it that 'shine'.

Now the head; this one is multiple steps.
Black oval to the back of the green snout
The black oval included is to make the black behind the nostrils and eyes. Start by attaching the snout to it, then attach both to the white piece.
Finished first piece of the head
Add the other green piece on top to finish off his cute face.
Fully assembled face
Now you can attach everything to the base!
Finished dragon
There we go! One adorable dragon ready for your page. If you're ready to get yours, they're now listed in the shop.

Enjoy the rest of the weekend, and happy crafting!


Sunday, July 15, 2012

Christmas in July on Etsy! Featured Shop: HampshireRose

Today's featured shop, chosen at random, is HampshireRose!


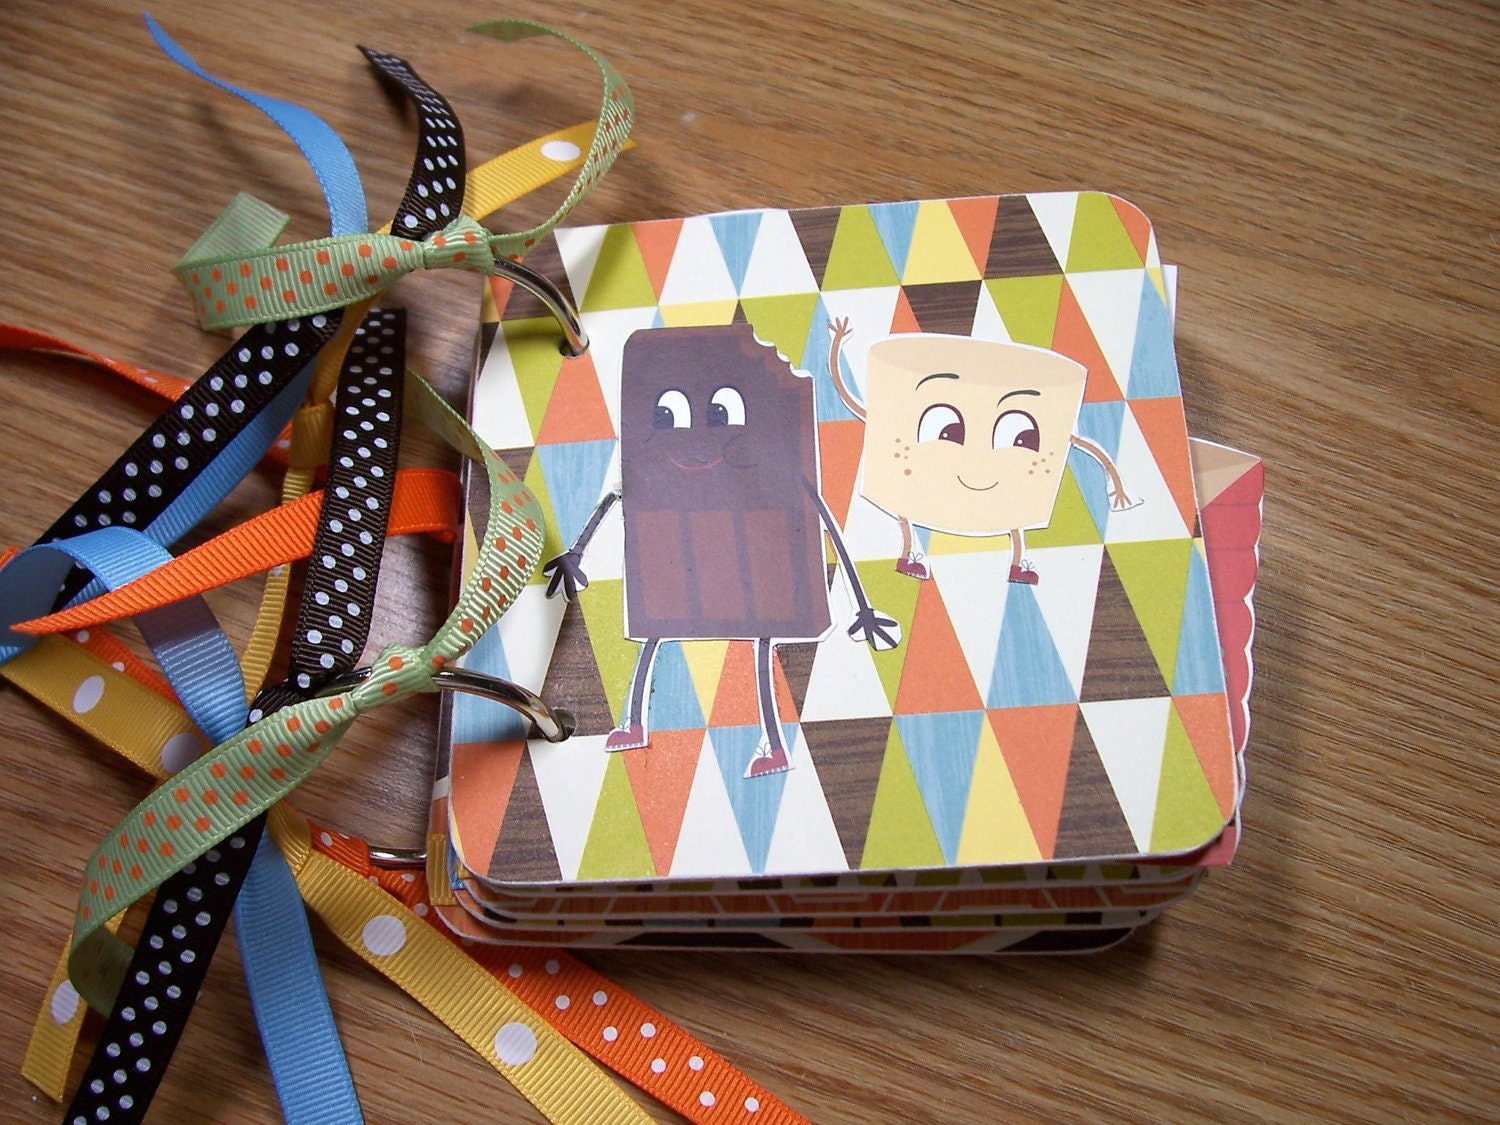
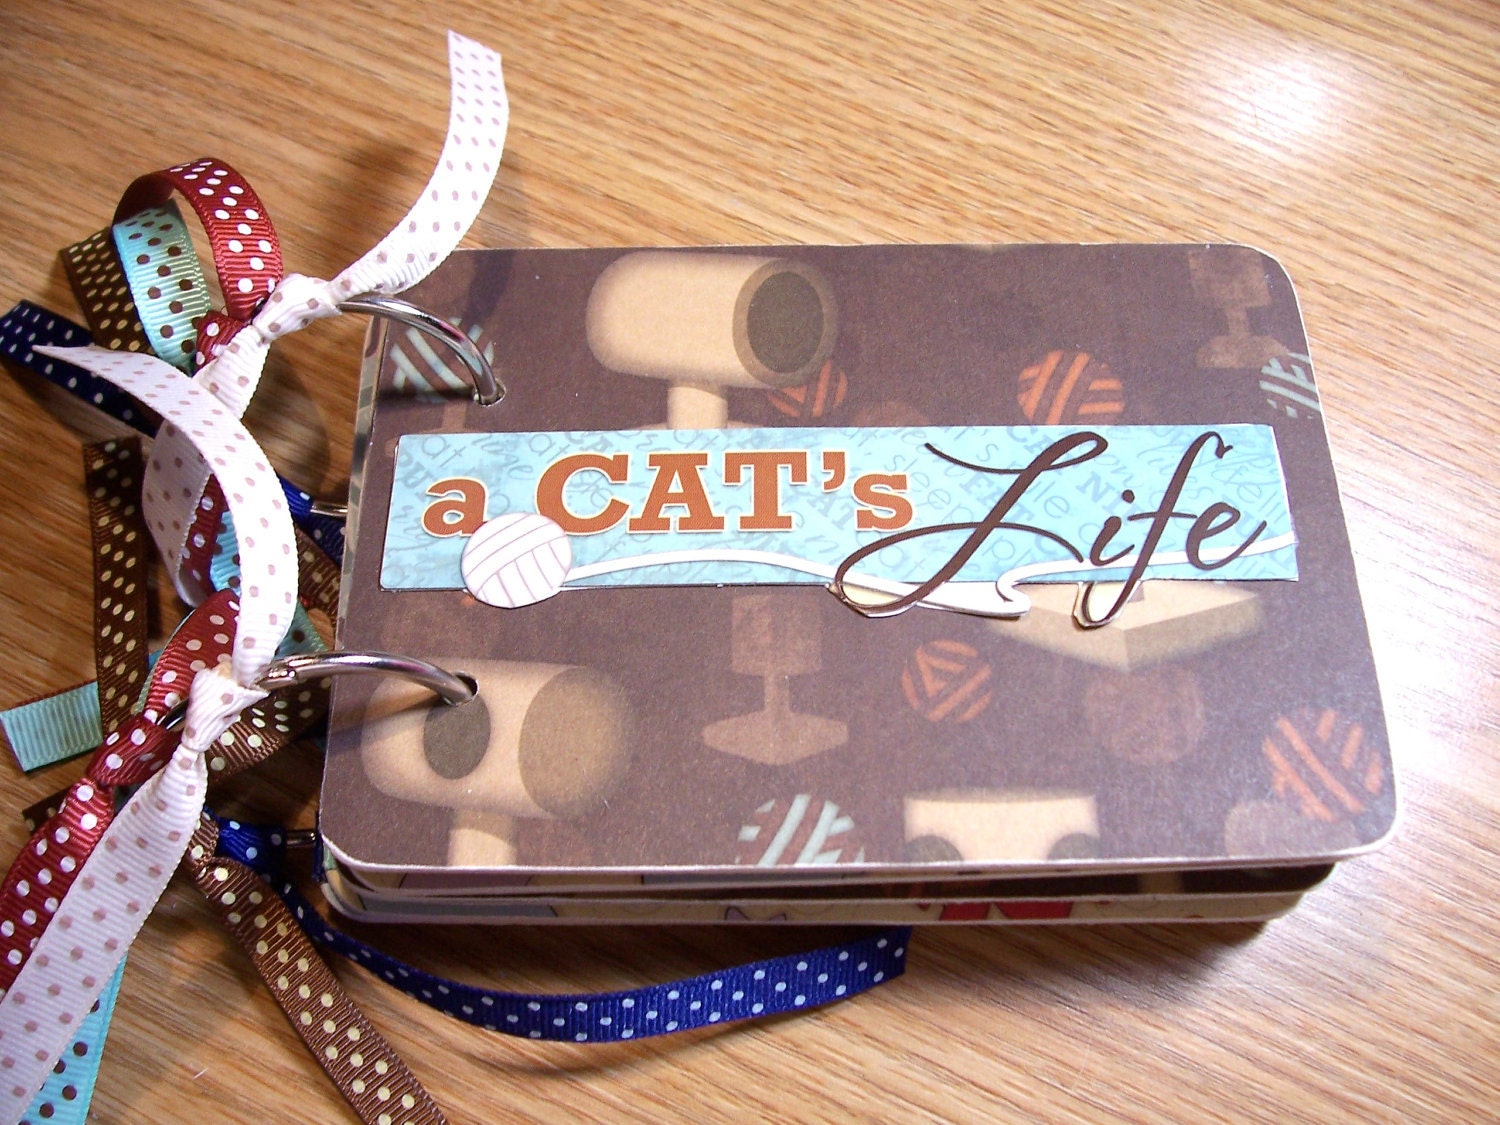
The store is run by Sharon and is stocked with little scrapbooks, all ready for your cherished photos. She's marked down her entire store for Christmas in July. Take a look at some of the books you can find.

Camping Mini Album
 We've been camping for the last week and a half, so I have to say I was drawn to this album! Mmmm, s'mores...so delicious!

Brown, Blue, and Gold Flower Mini Album
I like that this album is a different shape and that it's floral, yet totally usable for boys. Yes!

A Cat's Life Mini Album
I miss my kitties...and their antics deserve an album. She has ones for dog lovers, too.

So, to summarize today's shop of the day:

Hampshire Rose
Pre-made and Mini Scrapbook Albums
Entire store marked down for a limited time

Go, shop, find pretty things, and tell Sharon that Caffeinated Papercuts sent you! <3

Please note: I have not received compensation in any way to write about this shop. All views are my own personal ones and not from a script. I'm just that opinionated.

Monday, January 23, 2012

Time to Get Organized!

So my craft room had sort of gotten to the point where it was, well, a semi-organized mess. I knew it wasn't great, but with craft shows and the holidays there simply wasn't time to clean up. I started thinking about organizing again while at Target...their dollar bins had letter trays and assorted organizers. Ok, time to clean!

I spent two hours the other night sorting, sifting, filing, organizing, and tossing. It was almost embarrassing how many canvas boxes I had still in their wrappers! Those I used for my Cricut cartridges, Sizzix supplies, and boxes of card blanks. Those along with my Cricut, Big Kick, and new Spellbinder machine fit nicely in the one corner.
The wood you see is my laundry rack. Great in the summer, too cold this time of year!
Moving all of those around freed up space on my side table. There my stamps were slightly reorganized (I moved Christmas/winter to their own bin), Sharpies neatened in their bin, stamp pads sorted, and my assorted 'other things' neatened. Now I had space to add a letter tray for finished projects, one for open online orders, and get my tin o' templates where I can actually find it!
Business cards & mailing inserts are right by outgoing orders...think of it!
Next up was my work space...ugh. Paper scraps were taking up the majority of it, followed by punches, partially completed projects, pieces leftover from projects that could still be used...yeah, it was a mess. I started by using my $2.50 Target find - an over-the-door shoe organizer! It fit nearly all of my punches, just the really big ones are left on the table.
Tiny ones bunched together nicely and seasonal is on the bottom
After another 30-40 minutes of figuring out what was left on my table, it cleaned up well. The large paper scraps I moved to an empty 12"x12" scrapbook paper container I had picked up exactly for that purpose. All of my card base paper I use all the time I tucked under the table (easy when my "table" is actually a huge piece of wood on top of a bunk bed!). Out of the way, nice and flat, and very close by when I'm making cards.
Chipboard, envelopes, kraft paper...and it must be Valentine time with all that pink & red!
That cleaned off a LOT of space up top! I put stamps back away, moved Christmas back to its storage bins, and threw out some scraps that were miniscule and I was silly to keep. Now I had room to put my standard tools where the punches had lived, get my cutter out of the way, and had a much more manageable stack of scraps. The last letter tray I used to corral all those bits 'n pieces I was keeping so they don't get lost or destroyed. I left out the season I was currently on (Valentines!) but hey, there was actually room to do so! Wow!
A much, MUCH more organized end of the table!
Now I actually have room to lay out my supplies for whatever I'm working on AND have a ton of space leftover to work. See, I was already painting puzzle pieces!
My new, clean workbench! Yes, that is a Care Bear in the corner...he keeps me company
It was so great being reorganized that I made four cards last night - woohoo! It's amazing what you can do when you can find your supplies. :)

If you're curious about what the puzzle pieces were for, take a look in the shop: You're the Perfect Match

How have you organized your crafting space? I'd love to hear from you!

Happy Crafting!

Friday, January 13, 2012

Coffee Note Cards...with Fabric!


Well, it had to happen eventually - a post about coffee! It has finally snowed here for the first time since October (yes, you did read that correctly...don't ask) which means my favorite caffeinated beverage now needs to warm my hands while it keeps me going.

This summer I came across some awesome coffee fabric. I was drawn to it because 1) its coffee and 2) the pattern is rectangular. Usually for fabric crafts this is a deterrent (I really cannot see a skirt out of this) but for paper crafting it's perfect!
I simply had to have it and make cards out of it. To prep the fabric I (shudder!) ironed it out and then cut out some of the blocks. I then went back around them with pinking shears (the funny scissors that cut triangles) so that the fabric wouldn't unravel once on the card.
That's it! Now it's time to make some note cards!
What I used:
  • fabric cut with pinking shears
  • white card base, final size 4.25"x5.5" when folded
  • patterned paper cut to fit card front, 4.25"x5.5" (found at Joann's)
  • chocolate grosgrain ribbon, 1/2" wide x 4.25" long
  • blue cardstock (from stash)
  • sentiment stamp, "how've you bean?" (Fiskars)
  • StazOn Timber Brown ink pad
  • 1.5" square paper punch
  • adhesive
  • Xyron machine
  • ruler
  • paper cutter
  • scissors
Start by cutting the patterned paper to fit the front of your card. Ink up the edges, then attach to the card base using your adhesive. Ink up your sentiment stamp and stamp out a few onto your blue cardstock. Here's a good tip - stamp first, punch out second! That way you can line up your punch and make sure the sentiment is centered:
Stamp, stamp, stamp...
Punch, punch, punch!
Ink up the edges and then set aside to dry a little. Cut out your ribbon so that it fits the front of the card. I used my little Xyron sticker maker to apply the adhesive.
Nice and sticky!
Once everything is cut & dry, I ran the fabric squares and sentiment squares through my Xyron machine. They stacked nicely so that I didn't waste adhesive!
In they go...
All done!
Now, time to assemble. Attach your squares to where you want them on the card. Be careful, the fabric will try to stretch out of shape! Now stick your ribbon down, pop the sentiment square on top, and you've got a unique note card!

Have you ever combined paper with fabric? What was the result? Post your creations here, I'd love to see them!

Happy Crafting!

Wednesday, January 4, 2012

Homemade Coasters

It was a very handmade Christmas at our house. Not only was it a financially-sound option, but it was really satisfying to see someone really excited about gifts we made them.

For my sister and her fiance we made two sets of handmade coasters. Each set had four coasters and were actually very simple to make. We did one set with a monogram (luckily, their last names start with the same letter! It's even funnier that the same thing was true with my husband & I...lol) and the second set was with kitties & a puppy. They have several cats and a dog so it was fitting to give a nod to their furbabies as well.

So, how did we make them?

Warning: the photos came out awful! I had no idea until after the holidays, of course...sigh...

  •  4"x4" ceramic tiles that we found at Lowe's for $0.16/each
  • Mod Podge, matte finish
  • spray Mod Podge, matte finish
  • 3/4" felt furniture circles, 4/tile
  • foam brush
  • 4"x4" design*
*for these personalized tiles I made up my artwork in Photoshop, but you could easily use scrapbooking paper as well

Trim up your paper to 4"x4" and set aside. Lay out your tiles on a covered surface and get your Mod Podge ready. Lightly coat your first tile with Mod Podge and carefully lay your paper over the top. Smooth it out to remove all the bubbles and set aside to let dry. Keep smoothing bubbles around the edges as needed while it dries and don't be afraid to go back in with your finger and more Mod Podge to tack it all down. Continue for all of your tiles and let them all sit & dry.

Once dry, give them a second coat of Mod Podge. Once that coat is dry, spray them all with the spray Mod Podge to give it a sealant against spilled liquids...coasters do seem to attract those. (ba-dum-bump) Once everything is dry (we let them sit for a day or so), apply the felt circles on the bottom to give them that non-skid goodness we expect from coasters. Ta da, beautiful handmade coasters that didn't break the bank!
Monogram coasters with the letter 'L'
 
Kitty and puppy coasters
If you're Photoshop-savvy, here's how you make the custom artwork: open a new file and size it to 4"x4". Let your creative self go crazy! You can fit four printouts on a standard letter-size sheet for printing ease. I used a lightweight cardstock and I would not recommend going heavier.

Where did I get the idea for making coasters? Pinterest, of course! I am truly loving that site...all crafters should hang out on there. Feel free to follow my boards on there for inspiration of your own! If you do make coasters, please let me know so I can see how they came out.

Happy Crafting!

Thursday, August 25, 2011

Party Hat Invitations

As I wave goodbye to over 100 cards heading out to a craft show in Vermont, I finally have time to start crafting for myself again (and blogging about it!). Hard to believe that a year ago this time I was very pregnant and now I'm planning my son's first birthday party! Where has the time gone?!?

Naturally I'm taking on the task of making the invitations myself (the joys & trials of being a paper crafter) and inspiration struck when I saw the latest email from Scrapbooks Etc. featuring this card which shall now be referred to as the inspiration card. I loved the playfulness of it and headed off to the craft store to recreate it.

My original plan was to stay very close to the inspiration card - polka dot paper, bumbles on the bottom, button top. Hah! Not only could I not find polka dot paper but the cost of the bumbles was obscene. I'm only doing 20 invitations, but when one spool of bumbles costs $3.50 and only gets you 4 cards...um, NO. As I stood there fretting over what to do now, my husband looks at me and says "how about plain paper and fun ribbon?" Well heck, why didn't I think of that?!? Creative burnout, that must be it...did I mention the 109 cards?

So off my genius husband and I went to the ribbon aisle (I showed him where it was, regaining some crafty points) and he found a cute spool of polka dot ribbon. We took it back to the scrapbook paper aisle where he picked out some dark teal paper to complement the ribbon, handed it all to me and said "here, do your thing!" Ok, he also created a template out of scrap paper I had printed coupons on so we could figure out how many cards we could get from each 12"x12" sheet and what was a good size base card. It's nice to have a husband who can think creatively, too.

The rest, however, was now up to me. Raiding my mother's button collection (this is a perfect craft for all those buttons you have laying around!) I now had the last ingredient I needed for some adorable party invitations.

What I used:
  • dark teal 12"x12" card stock
  • yellow 12"x12" card stock
  • green 12"x12" card stock
  • spool of polka dot ribbon
  • spare buttons no more than 3/8"
  • 1-1/2" circle punch
  • Cricut to make the number 1's (from George & Basic Shapes, 2" tall)
  • chalk to ink the edges 
  • adhesive
  • paper cutter and/or scissors
  • word processing software to create the wording

My first step was to create the actual invitation wording for the party. For this I used Publisher, created a new page size, and added a triangle shape to stay inside of. I didn't want the wording to fill the entire inside of the card, so I made it about 1/2" smaller than the card. After setting up my shape it was a simple matter of staying inside the lines, choosing colors that complemented the card design, and printing them out on white card stock. I was able to get four invitations to a page which was great. Using as little paper as possible always makes me happy.

Those swirlies are me preventing party crashers...;) I printed this one on scrap paper which is why it looks, well, blah.
Now it was time to start making the party hat. Taking the teal card stock I cut the sheets into four 6"x6" squares. The square was then folded on the diagonal making a triangle, but not the type of triangle I wanted.

Using the point on the unfolded side I drew a line across the bottom and cut off the extra. Now it looks like a party hat!

Next I inked all the edges and the crease on the hat. You don't have to do this, but I'm an edge-inking addict and couldn't help myself.

While the edges dried I set up my Cricut to start cutting number 1's out of the yellow card stock. With the machine cutting away I set to work punching out circles. Amazingly enough they were done pretty fast and I inked all those edges before setting them aside. What, I told you I'm addicted...

Next was cutting the ribbon into lengths. I made each strip just a little larger than the bottom of the card to leave room for trimming it down to the angle of the card. My buttons didn't need anything (I decided not to make that huge, crazy bow) so now I was ready to start assembling!

Taking my card I attached the invitation wording to the inside with my adhesive.

Back on the front of the card I added the ribbon along the bottom and trimmed the ends to the shape of the card.

The circle went in the middle with the number on top. Adding the button on the top point I was done!
Hmm, now where did that number 1 go...?
Just 19 more to go...best part is that now the card fits nicely in a standard envelope, so no added postage!


Had I stuck with the bumbles on the bottom as in the inspiration card, something tells me they wouldn't have survived the post office.

Let me know if you try this yourself - I'd love to see pictures! Happy Crafting!

Monday, June 27, 2011

Water Fun Monday

I hope everyone had a drier weekend than I did! We've had rain nonstop since Tuesday...welcome to summer?!? All this water everywhere has me dreaming of the beach and inspired this paper.

Warm sunny days, waves lapping at the shore...yeah, I'm ready for the beach! In the meantime I have to go stack some blocks for my son to knock down.

Happy Crafting!


Friday, May 13, 2011

Tip of the Day: Always Ink your Edges

Going to local scrapbooking crops is a great way to get inspiration from others who share your interest in scrapping, card making, and paper crafting in general. My very first crop at a local store, Captured Moments, taught me a very important tip: always ink your edges!

We all use shapes and cut-outs on our projects so there's always edges. Here I have small stamped squares I'll be adding to cards. The chocolate-colored sentiment looks pretty on the blue cardstock, but it's missing something. It doesn't quite look finished. Time to ink the edges!

While the squares are pretty, a little chalk just makes them pop!

You can use stamp pads or chalk ink pads for this. In this case I chose a similar brown chalk ink by VersaMagic  in Jumbo Java (I love the name!) and just swept it around my edges.  See the difference? It's amazing what a little ink can do!

Adding a little chalk to the squares on the left makes all the difference!
It really makes the square pop on the finished card.

Happy crafting!